Hello, Coco in Eclipse!
In this section, we will step through how to create a Coco project and module, run the verification, and generate code using Popili in Eclipse. This is intended to be a quick tour of the basic steps to help you get started. See Popili in Eclipse for a more detailed overview. We will not be focusing on any details about the Coco language here, but you can find a comprehensive overview in the Coco Language Reference.
We assume that you have Popili successfully installed in Eclipse. If not, then login and see the installation guide on our Downloads page for guidance.
Creating a Coco Project
We start by creating a new Coco project in Eclipse as follows:
- Make sure the Popili perspective is open, which is denoted by the Popili logo
 in the top right-hand side of
the Eclipse toolbar. See Popili Perspective for further details on how to select the Popili perspective in
the event it is not set by default.
in the top right-hand side of
the Eclipse toolbar. See Popili Perspective for further details on how to select the Popili perspective in
the event it is not set by default. - Select File → New → Coco Project.
- Complete the project dialog as follows:
- Enter a project name. We will be writing a simple traffic light example in Coco for you to use, so we have called the project TrafficLight_Project.
- Select Use default location, if not already selected by default, to specify that all the source files for this project are to be stored in your Eclipse workspace.
- Select Create separate folders for source files, if not already selected by default. This creates a folder named src, and all Coco source files must be created in this folder.
- Click on the Finish button.
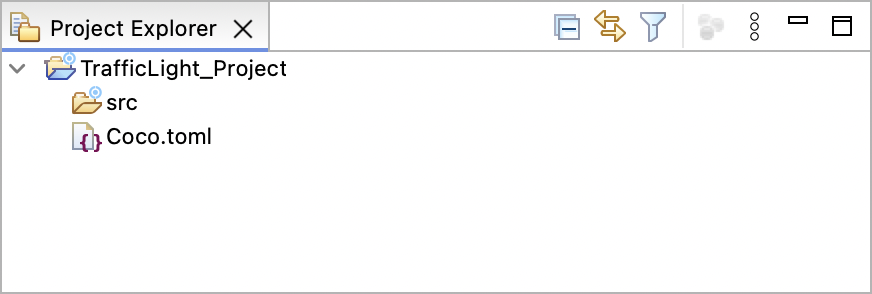
Upon completion, your Coco project will appear in the Project Explorer view as follows:
Creating a Coco Module
To create a Coco module:
- Ensure the TrafficLight_Project project is selected in the Project Explorer view.
- Select File → New → Coco Module.
- Complete the Create New File dialog as follows:
- Select the TrafficLight_Project project, expand its node and select the src folder.
- Enter a name for your Coco module in the File name field. For example, the Coco module is our running example is called TrafficLight.coco.
- Click Finish.
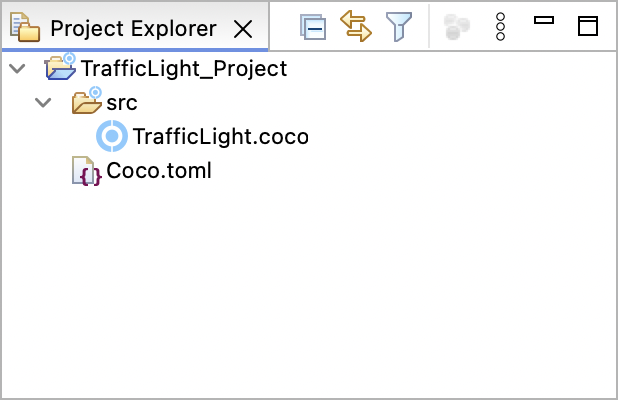
Upon completion, your Coco module will appear in the Project Explorer view as follows:
Insert the following Coco into your newly created module:
enum Colour {
  case Red
  case RedAmber
  case Green
  case Amber
}

port TrafficLight {
  function begin() : Nil
  outgoing signal lightStatus(colour : Colour)

  machine {
    var status : Colour = .Red

    state Inactive {
      begin() = {
        lightStatus(status);
        setNextState(Active);
      }
    }
    state Active {
      spontaneous = {
        status = match (status) {
          .Red => .RedAmber,
          .Green => .Amber,
          .Amber => .Red,
          .RedAmber => .Green,
        };
        lightStatus(status);
      }
    }
  }
}

@runtime(.MultiThreaded)
component TrafficLightImpl {
  val client : Provided<TrafficLight>

  machine {
    state Inactive {
      client.begin() = setNextState(Active.Stop)
    }
    state Active {
      state Stop {
        after(seconds(90)) = {
          client.lightStatus(.RedAmber);
          setNextState(ReadyToGo);
        }
      }
      state Go {
        after(seconds(120)) = {
          client.lightStatus(.Amber);
          setNextState(ReadyToStop);
        }
      }
      state ReadyToGo {
        after(seconds(3)) = {
          client.lightStatus(.Green);
          setNextState(Go);
        }
      }
      state ReadyToStop {
        after(seconds(3)) = {
          client.lightStatus(.Red);
          setNextState(Stop);
        }
      }
    }
  }
}
If you are writing this example yourself, you will see some of the features we have in our Coco editor, such as semantically-aware code completion, inline errors and warnings, and automatic formatting (upon saving). Further details about these features can be found in Popili Tooling → Eclipse.
In this traffic light example, we have a port called TrafficLight, and a component called
TrafficLightImpl, which has an instance client of TrafficLight as its provided port, and no required ports. A
component’s provided port acts as its specification, which the component must correctly implement. Popili
will automatically formally verify whether this is the case, together with a number of other properties, and provide
graphical counterexamples of any errors found. You can find further details about what properties are
verified in the Coco Language Reference.
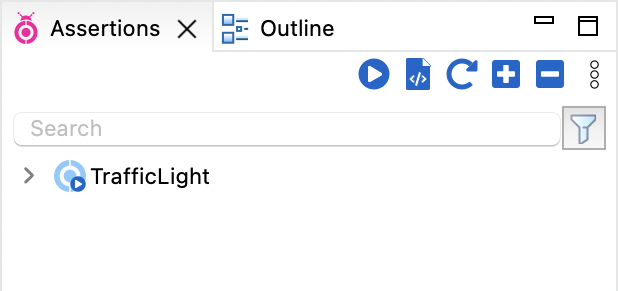
When you save your Coco module, and provided you have not introduced any syntax or type errors, you will see an
assertion in the Assertions view, labelled with the module name (in our case, TrafficLight):
Verifying Coco
The Assertions view lists all the assertions that will be formally verified by Popili. You can expand an assertion by clicking
on the grey arrow in front of it to reveal the ports and components, and the properties that will be
verified for each. To verify the entire project, click on  in the toolbar of the Assertions view:
There are a number of different assertion results that can arise from running the verification, each of which are denoted by a specific icon. A summary of them all can be found in Popili Tooling → Eclipse.
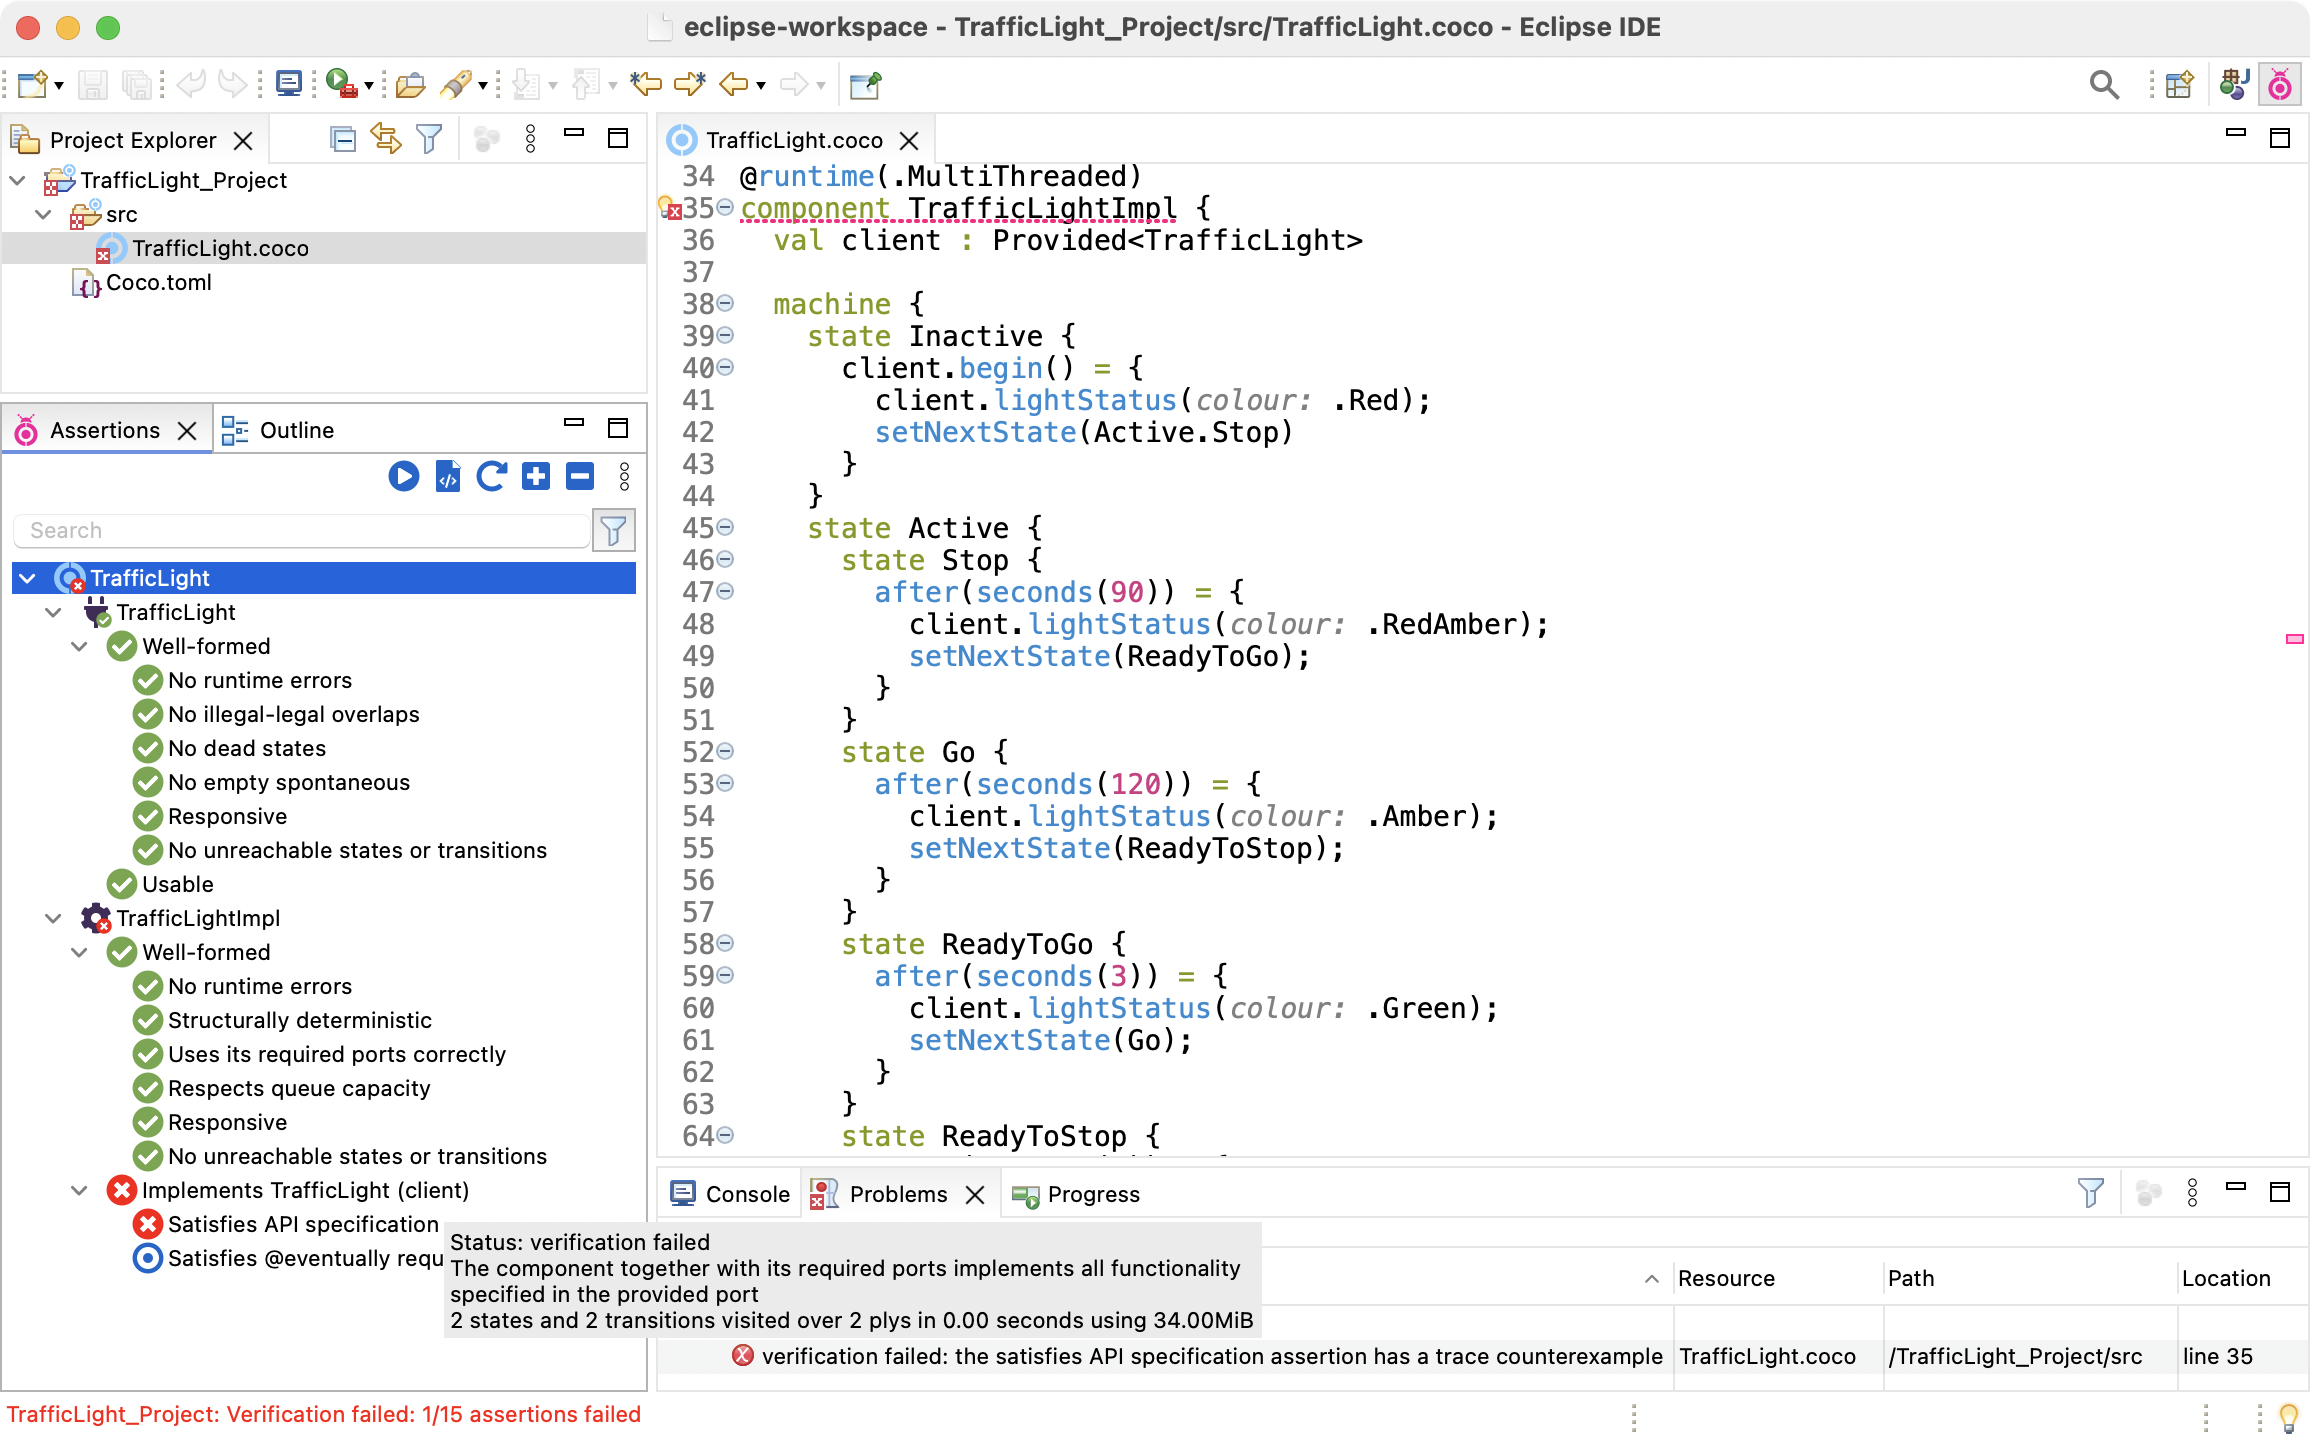
In our example, all of the assertions for the port pass (denoted by  ), whereas the
component has failed the assertion (denoted by
), whereas the
component has failed the assertion (denoted by  ) that specifies that it must correctly implements its
provided port. As illustrated above, if you hover your cursor over a failed assertion, then a tooltip is displayed with a brief
description of the property being checked.
) that specifies that it must correctly implements its
provided port. As illustrated above, if you hover your cursor over a failed assertion, then a tooltip is displayed with a brief
description of the property being checked.
To debug this error, double-click on the failed assertion to open a Counterexamples view, which describes how the property was violated:
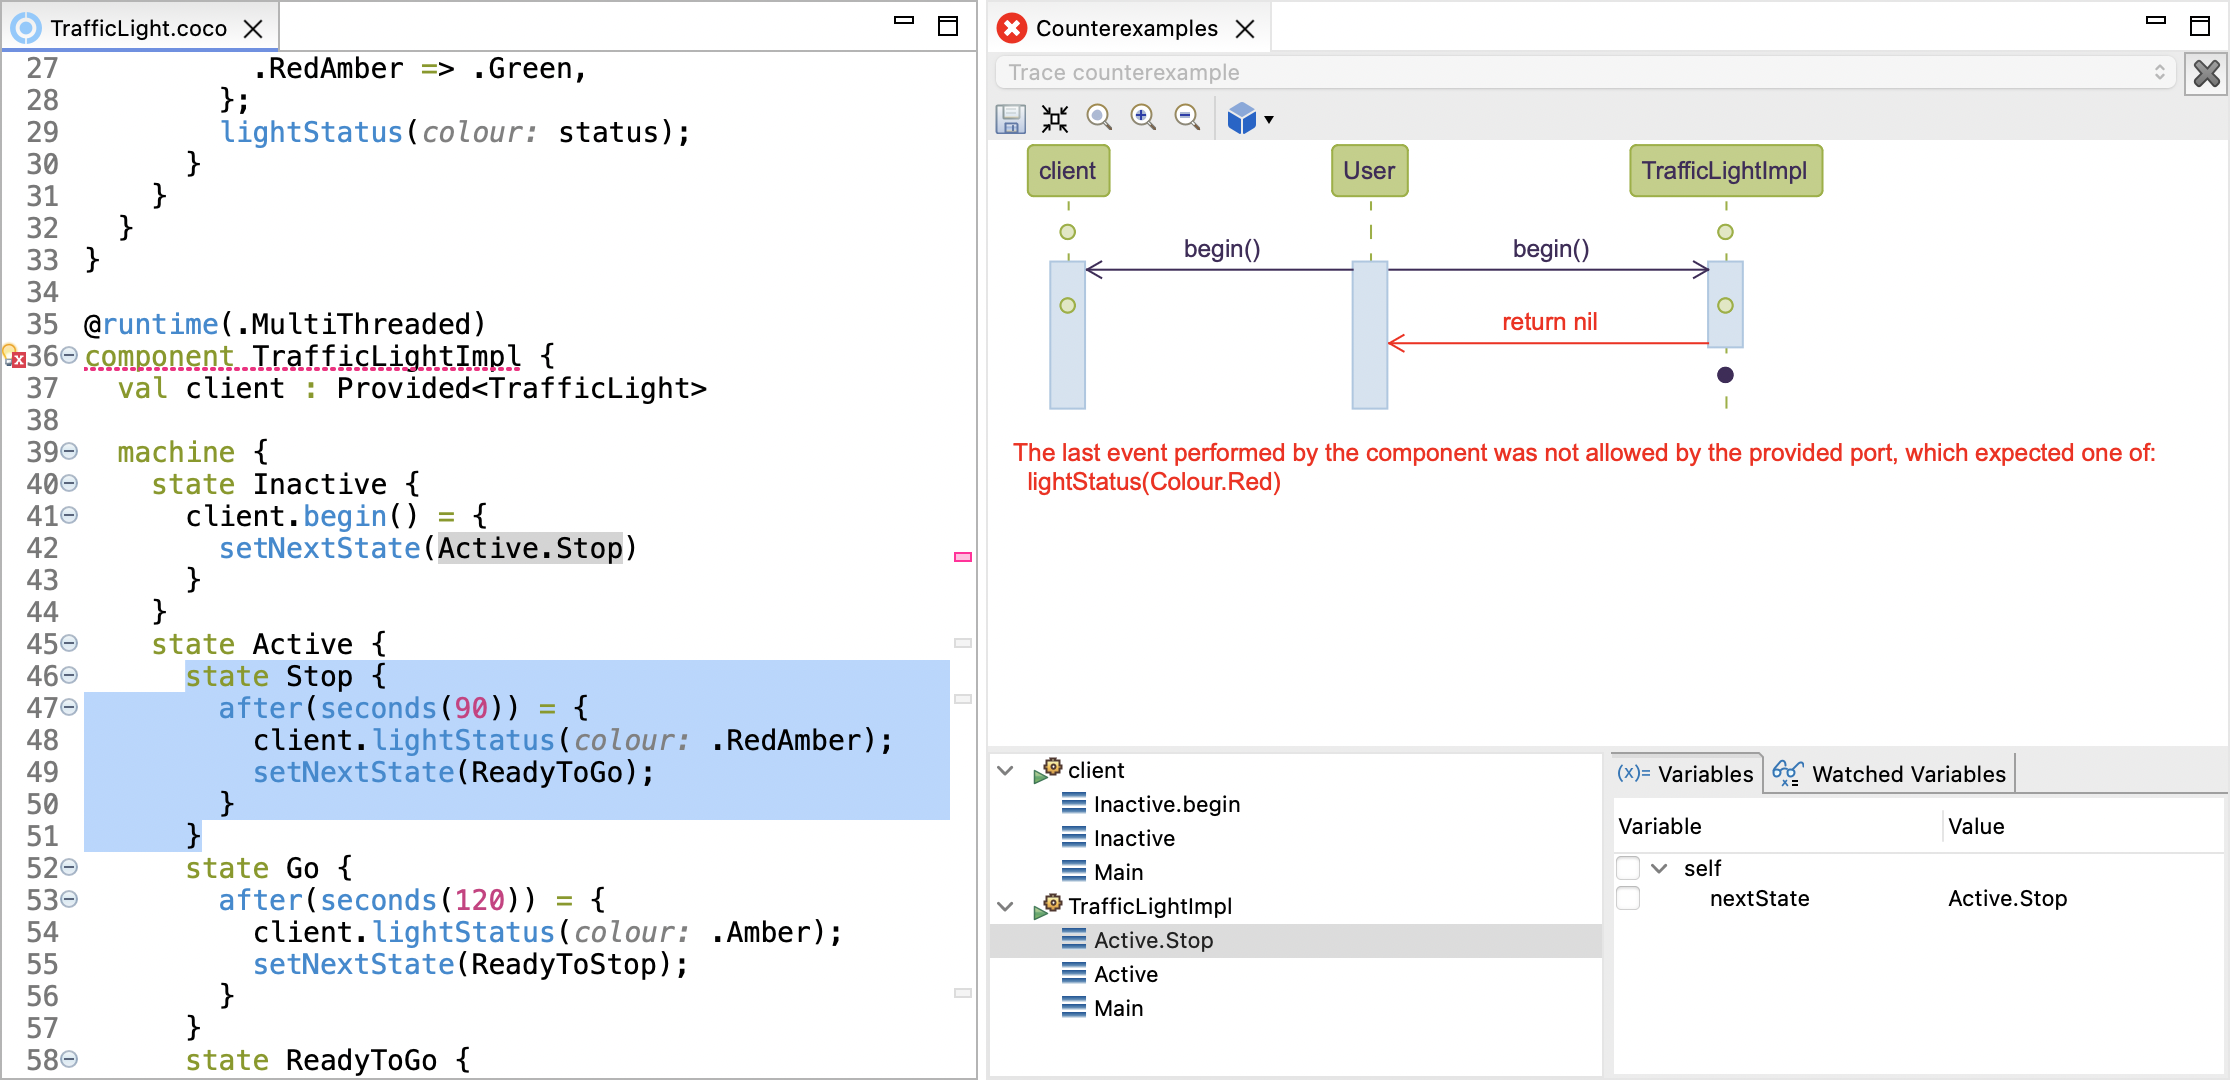
As illustrated above, the Counterexamples view consists of a graphical sequence diagram, describing (one of) the shortest
sequences of interactions that the component could perform that led to it violating its provided port specification.
For this type of counterexample, there are three swimlanes in the sequence diagram: one for the component
(TrafficLight), one for the component’s provided port (client), and one labelled User, which represents an external
entity invoking all possible calls allowed by the provided port. If the component correctly implements its provided port,
then it must perform all events that its provided port specifies it must, and it must not be able to perform any events
that are not permitted by its provided port. You can find a more detailed description of this property (and all other
properties verified) in the Coco Language Reference.
In our example, we can see when the begin() function is called on the component, it immediately returns. This is not
allowed by its provided port, which specifies that when begin() is called, the component must send the signal
lightStatus(Colour.Red) and then return.
The Counterexamples view also provides additional information below the sequence diagram to help users understand the errors found by the verification. You can find further details about these features, and how you can use them effectively to debug your software, in Coco Tooling - Eclipse.
To correct the error found in our example, go to the component’s state InActive and replace the event transition
for begin() with the following:
client.begin() = {
  client.lightStatus(.Red);
  setNextState(Active.Stop);
}
If you save your changes, and rerun the verification, then all of the assertions should now pass.
Generating Code
Now that your Coco project passes all of the verification checks, you can automatically generate the code
in your chosen target language by either: clicking on  in the Assertions view menu;
or right-clicking on your project in the Project Explorer view, and selecting Popili → Generate Code from the
popup menu.
in the Assertions view menu;
or right-clicking on your project in the Project Explorer view, and selecting Popili → Generate Code from the
popup menu.
The code will be generated in the subfolder called generated within your project. If this folder does not already exist, it will be automatically generated.
Hello, Coco in VS Code!
In this section, we will step through how to create a Coco package and module, run the verification, and generate code using Popili in VS Code. This is intended to be a quick tour of the basic steps to help you get started. See Popili in VS Code for a more detailed overview. We will not be focusing on any details about the Coco language here, but you can find a comprehensive overview in the Coco Language Reference.
We assume that you have Popili successfully installed in VS Code. If not, then login and see the installation guide on our Downloads page for guidance.
Creating a Coco Package
To create a new Coco package in VS Code, open the Command Palette (Ctrl+Shift+P on Linux and Windows, and Cmd+Shift+P on MacOS), and search for Popili : New Project :

Complete the steps for creating a new package:
- Select the folder for your package or create a new one, and then click on Create Project. We will be writing a simple traffic light example in Coco for you to use, so we have created a package called TrafficLight_Project.
- Select the target language from the dropdown list.
- Select the package name. By default, Popili will propose your package (folder) name.
- Select the source file location for your Coco modules. By default, Popili will propose src.
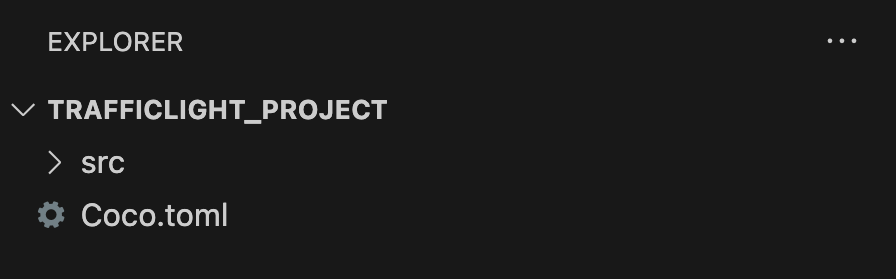
Upon completion, your Coco package will appear in the Explorer view as follows:
Creating a Coco Module
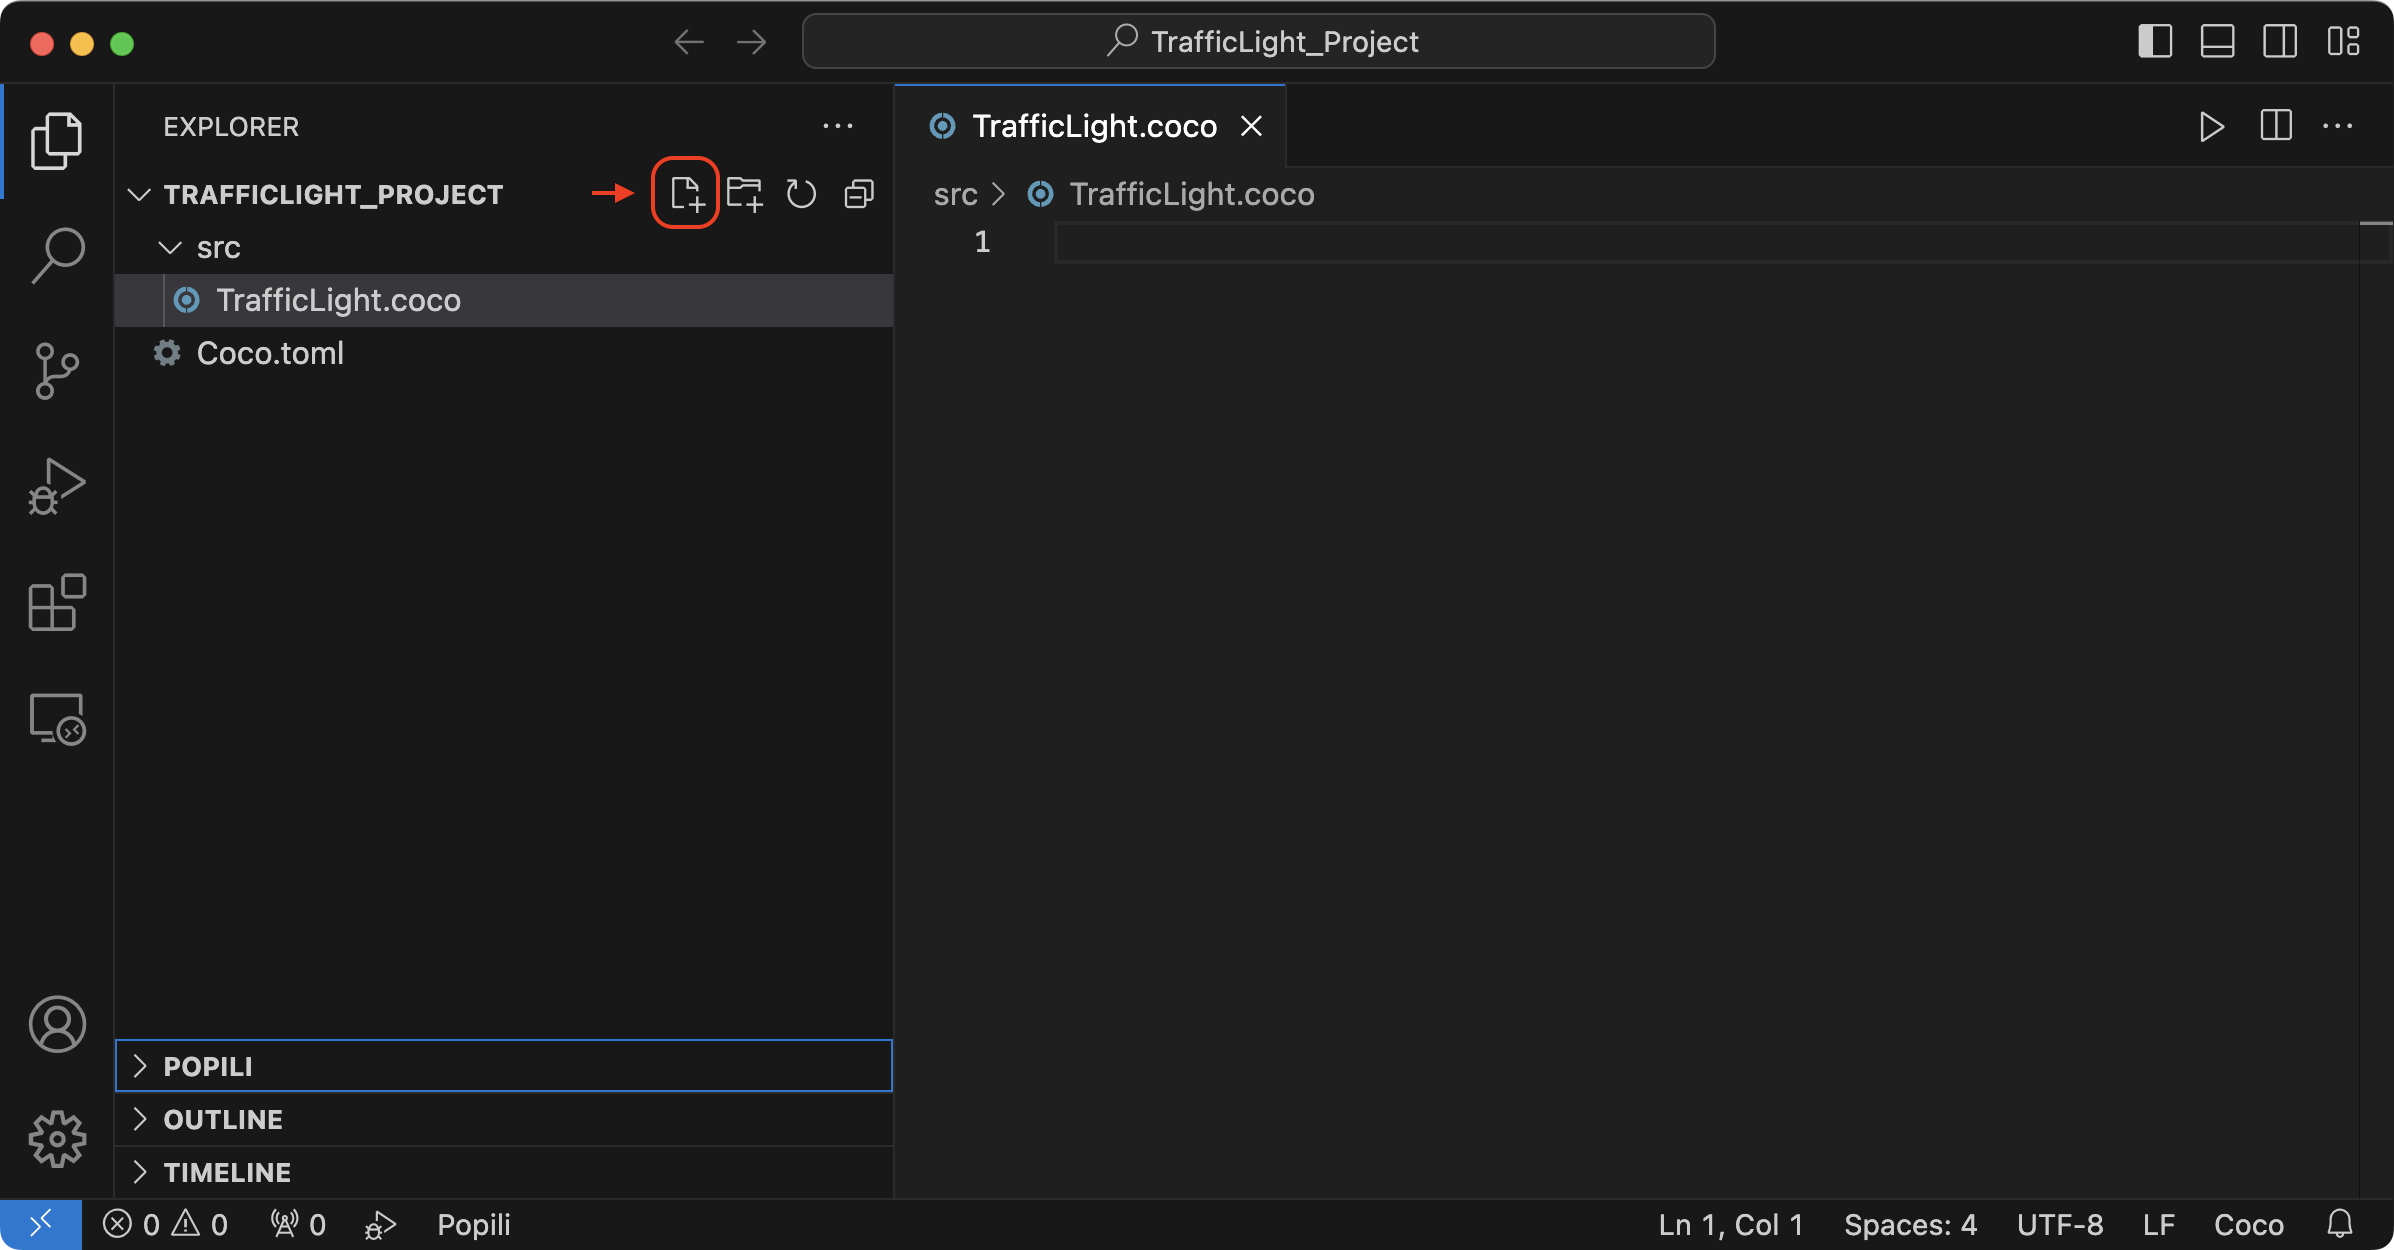
To create a Coco module in your TrafficLight_Project package, select the source file location
(for example, src used by default), and click on the New File icon (highlighted below), and enter
the name for your Coco module, suffixed with .coco:
Insert the following Coco code into your newly created module:
enum Colour {
  case Red
  case RedAmber
  case Green
  case Amber
}

port TrafficLight {
  function begin() : Nil
  outgoing signal lightStatus(colour : Colour)

  machine {
    var status : Colour = .Red

    state Inactive {
      begin() = {
        lightStatus(status);
        setNextState(Active);
      }
    }
    state Active {
      spontaneous = {
        status = match (status) {
          .Red => .RedAmber,
          .Green => .Amber,
          .Amber => .Red,
          .RedAmber => .Green,
        };
        lightStatus(status);
      }
    }
  }
}

@runtime(.MultiThreaded)
component TrafficLightImpl {
  val client : Provided<TrafficLight>

  machine {
    state Inactive {
      client.begin() = setNextState(Active.Stop)
    }
    state Active {
      state Stop {
        after(seconds(90)) = {
          client.lightStatus(.RedAmber);
          setNextState(ReadyToGo);
        }
      }
      state Go {
        after(seconds(120)) = {
          client.lightStatus(.Amber);
          setNextState(ReadyToStop);
        }
      }
      state ReadyToGo {
        after(seconds(3)) = {
          client.lightStatus(.Green);
          setNextState(Go);
        }
      }
      state ReadyToStop {
        after(seconds(3)) = {
          client.lightStatus(.Red);
          setNextState(Stop);
        }
      }
    }
  }
}
If you are writing this example yourself, you will see some of the features we have in our Coco editor, such as semantically-aware code completion, inline errors and warnings, and automatic formatting. Further details about these features can be found in Popili Tooling → VS Code.
In this traffic light example, we have a port called TrafficLight, and a component called
TrafficLightImpl, which has an instance client of TrafficLight as its provided port, and no required ports. A
component’s provided port acts as its specification, which the component must correctly implement. Popili
will automatically formally verify whether this is the case, together with a number of other properties, and provide
graphical counterexamples of any errors found. You can find further details about what properties are
verified in the Coco Language Reference.
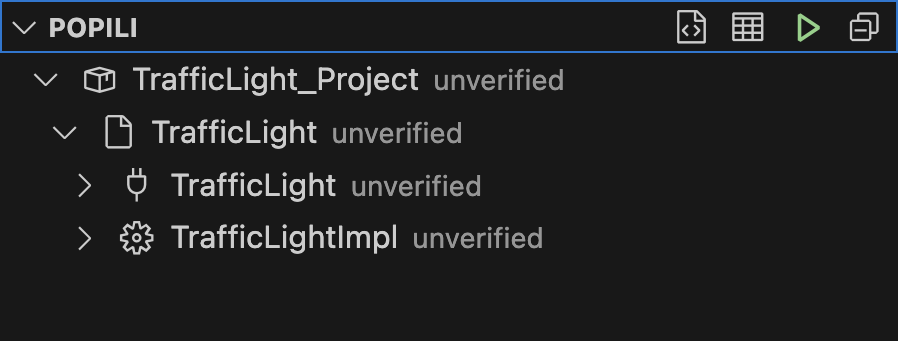
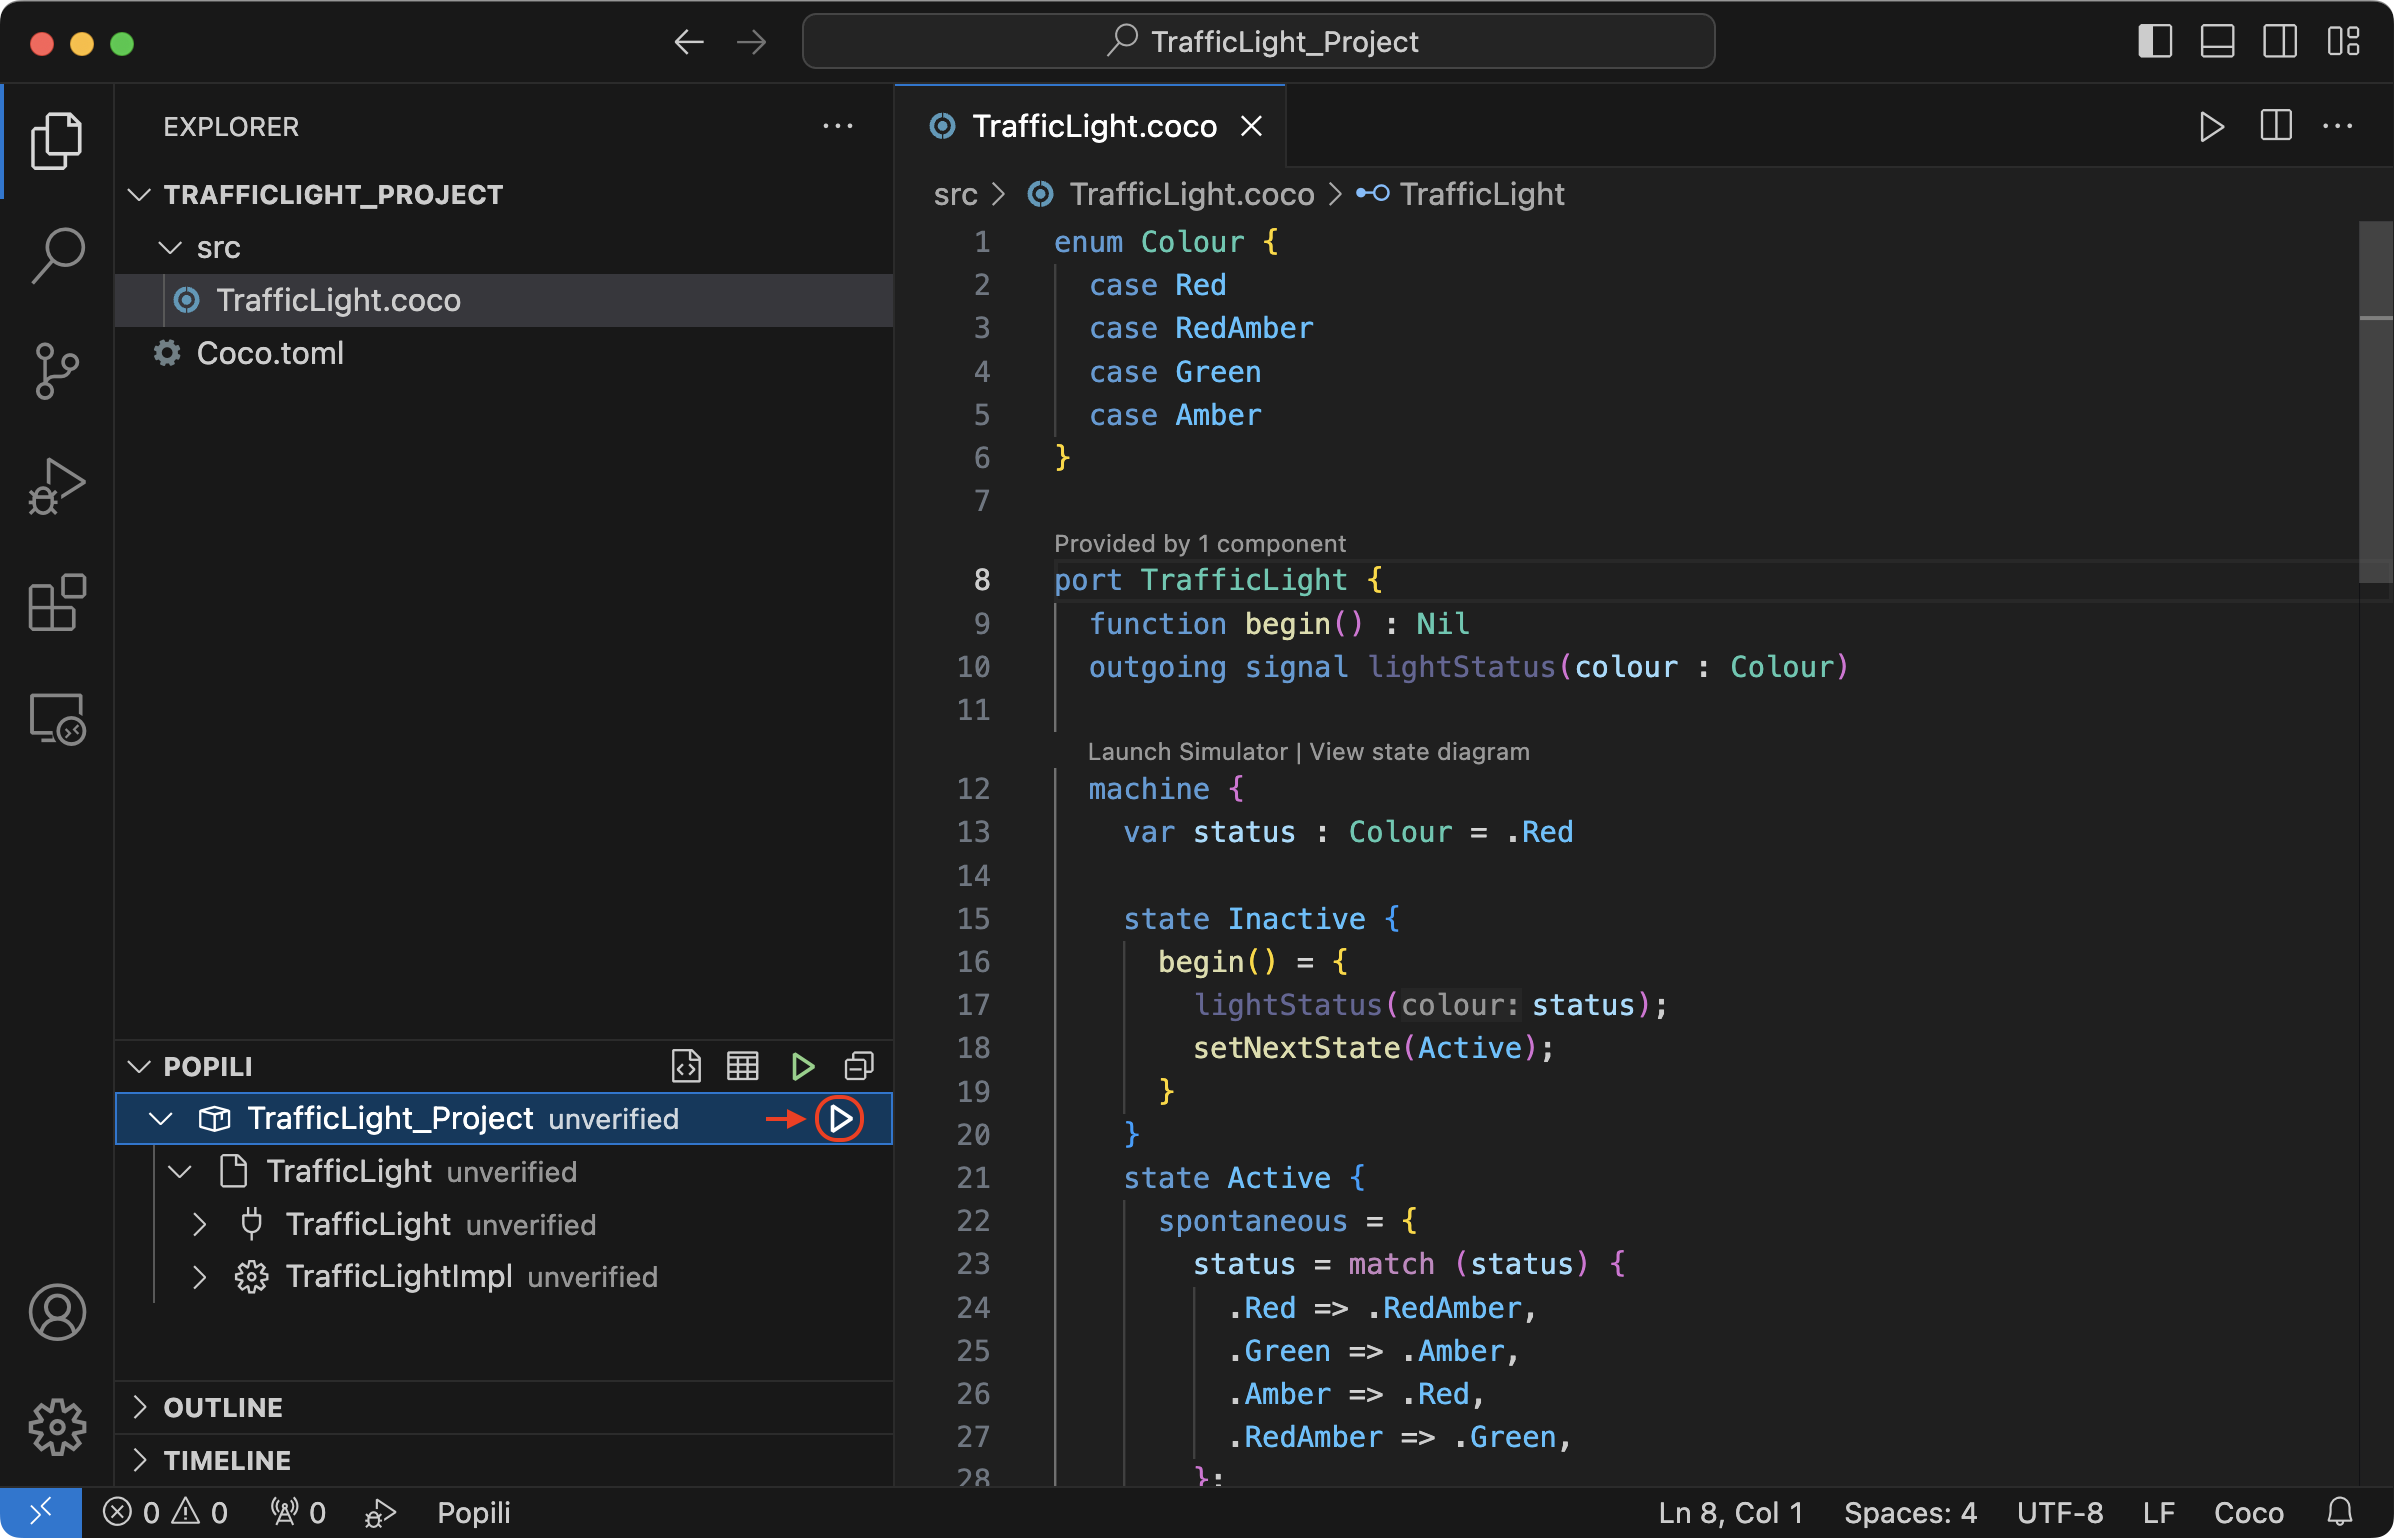
Once you have added the port and component from our example above, and provided you have not introduced any syntax or
type errors, you will see a list of assertions appear in Popili’s assertions view, with the topmost one labelled
with your package name (in our case, TrafficLight_Project):
Verifying Coco
The Assertions view lists all of the assertions that will be formally verified by Popili. You can expand assertions by clicking on the grey arrows in front of them to reveal their nested assertions such as the ports and components, and the properties that will be verified for each one. One way to verify your package is to hover your cursor on your package assertion, and click on , which appears on the right of it:
Popili will formally verify all the assertions, and indicate which ones have passed, failed or could not be verified (due to having dependencies upon other assertions that have failed):
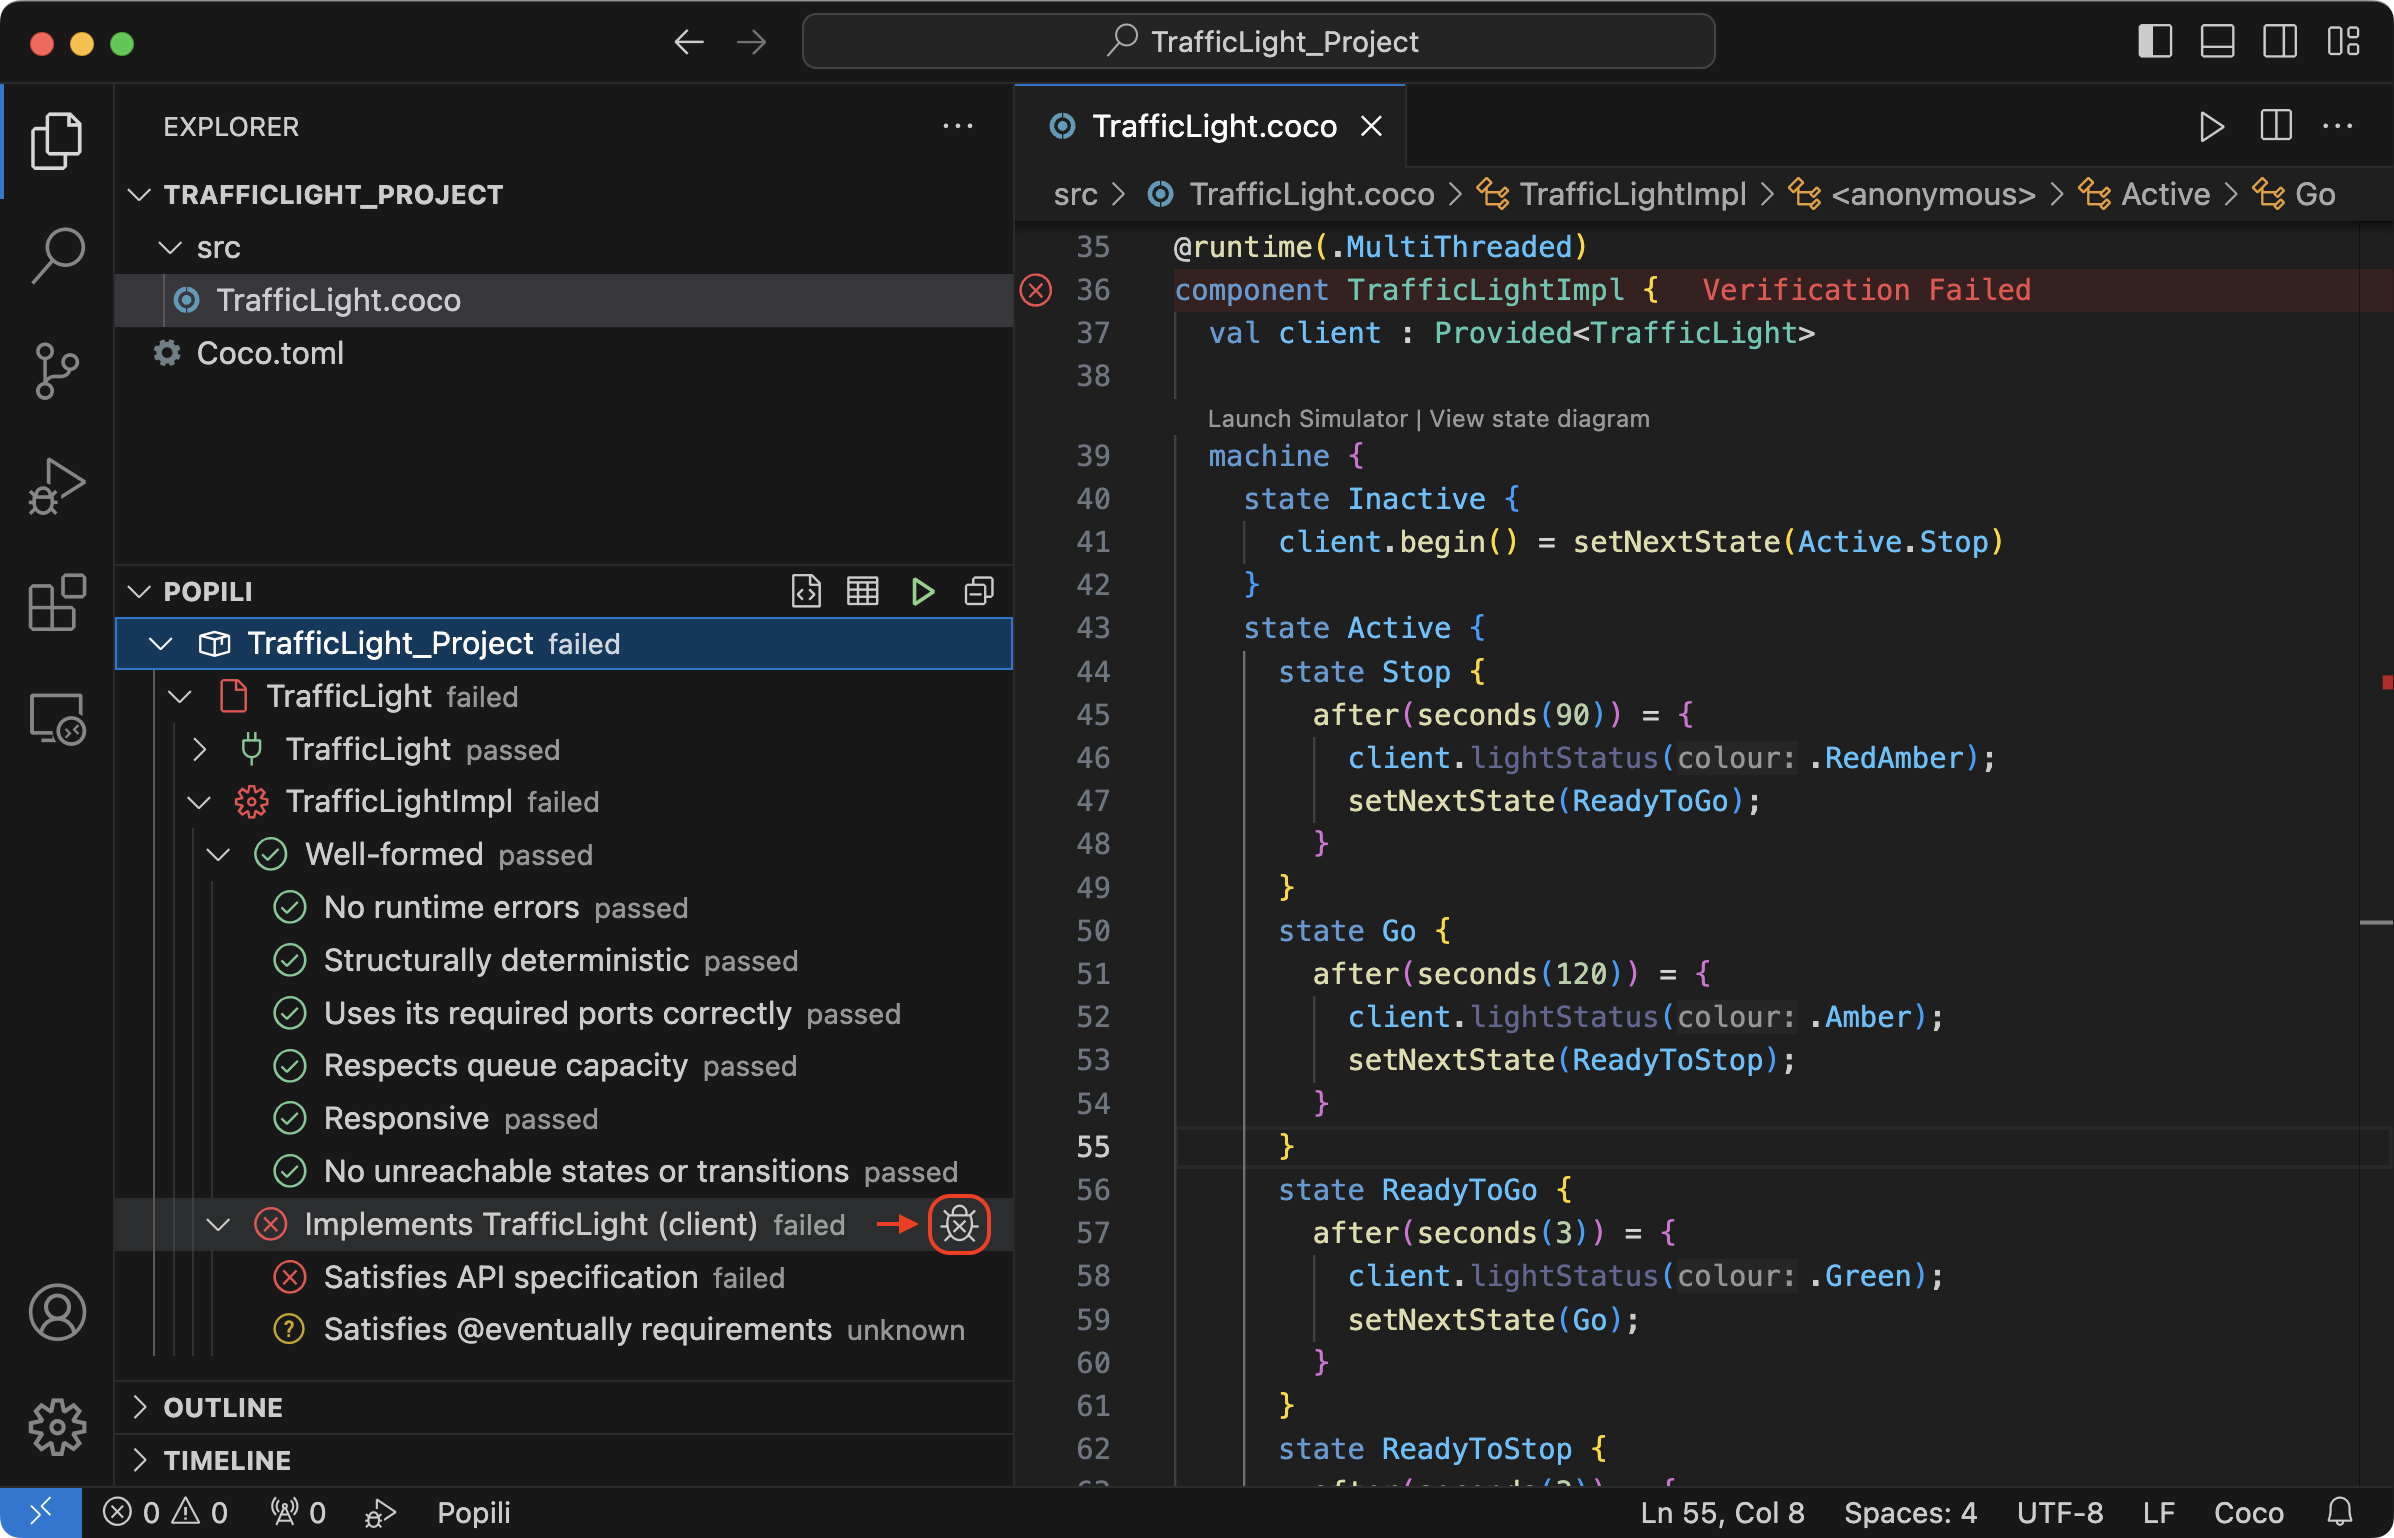
There are a number of different assertion results that can arise from running the verification. A summary of them all can be found in Popili Tooling → VS Code.
In our example, all of the assertions for the port pass, whereas the component has failed the assertion that specifies that it must correctly implements its provided port. If you hover your cursor over a failed assertion, then a tooltip is displayed with a brief description of the property being checked, together with a summary of its verification statistics. To debug this error, you need to launch the debugger. One way of doing this is to hover over the failed assertion and click on , which appears on the right of it, as highlighted above.
For a verification error, this will launch the debugger view, together with a counterexample describing the error:
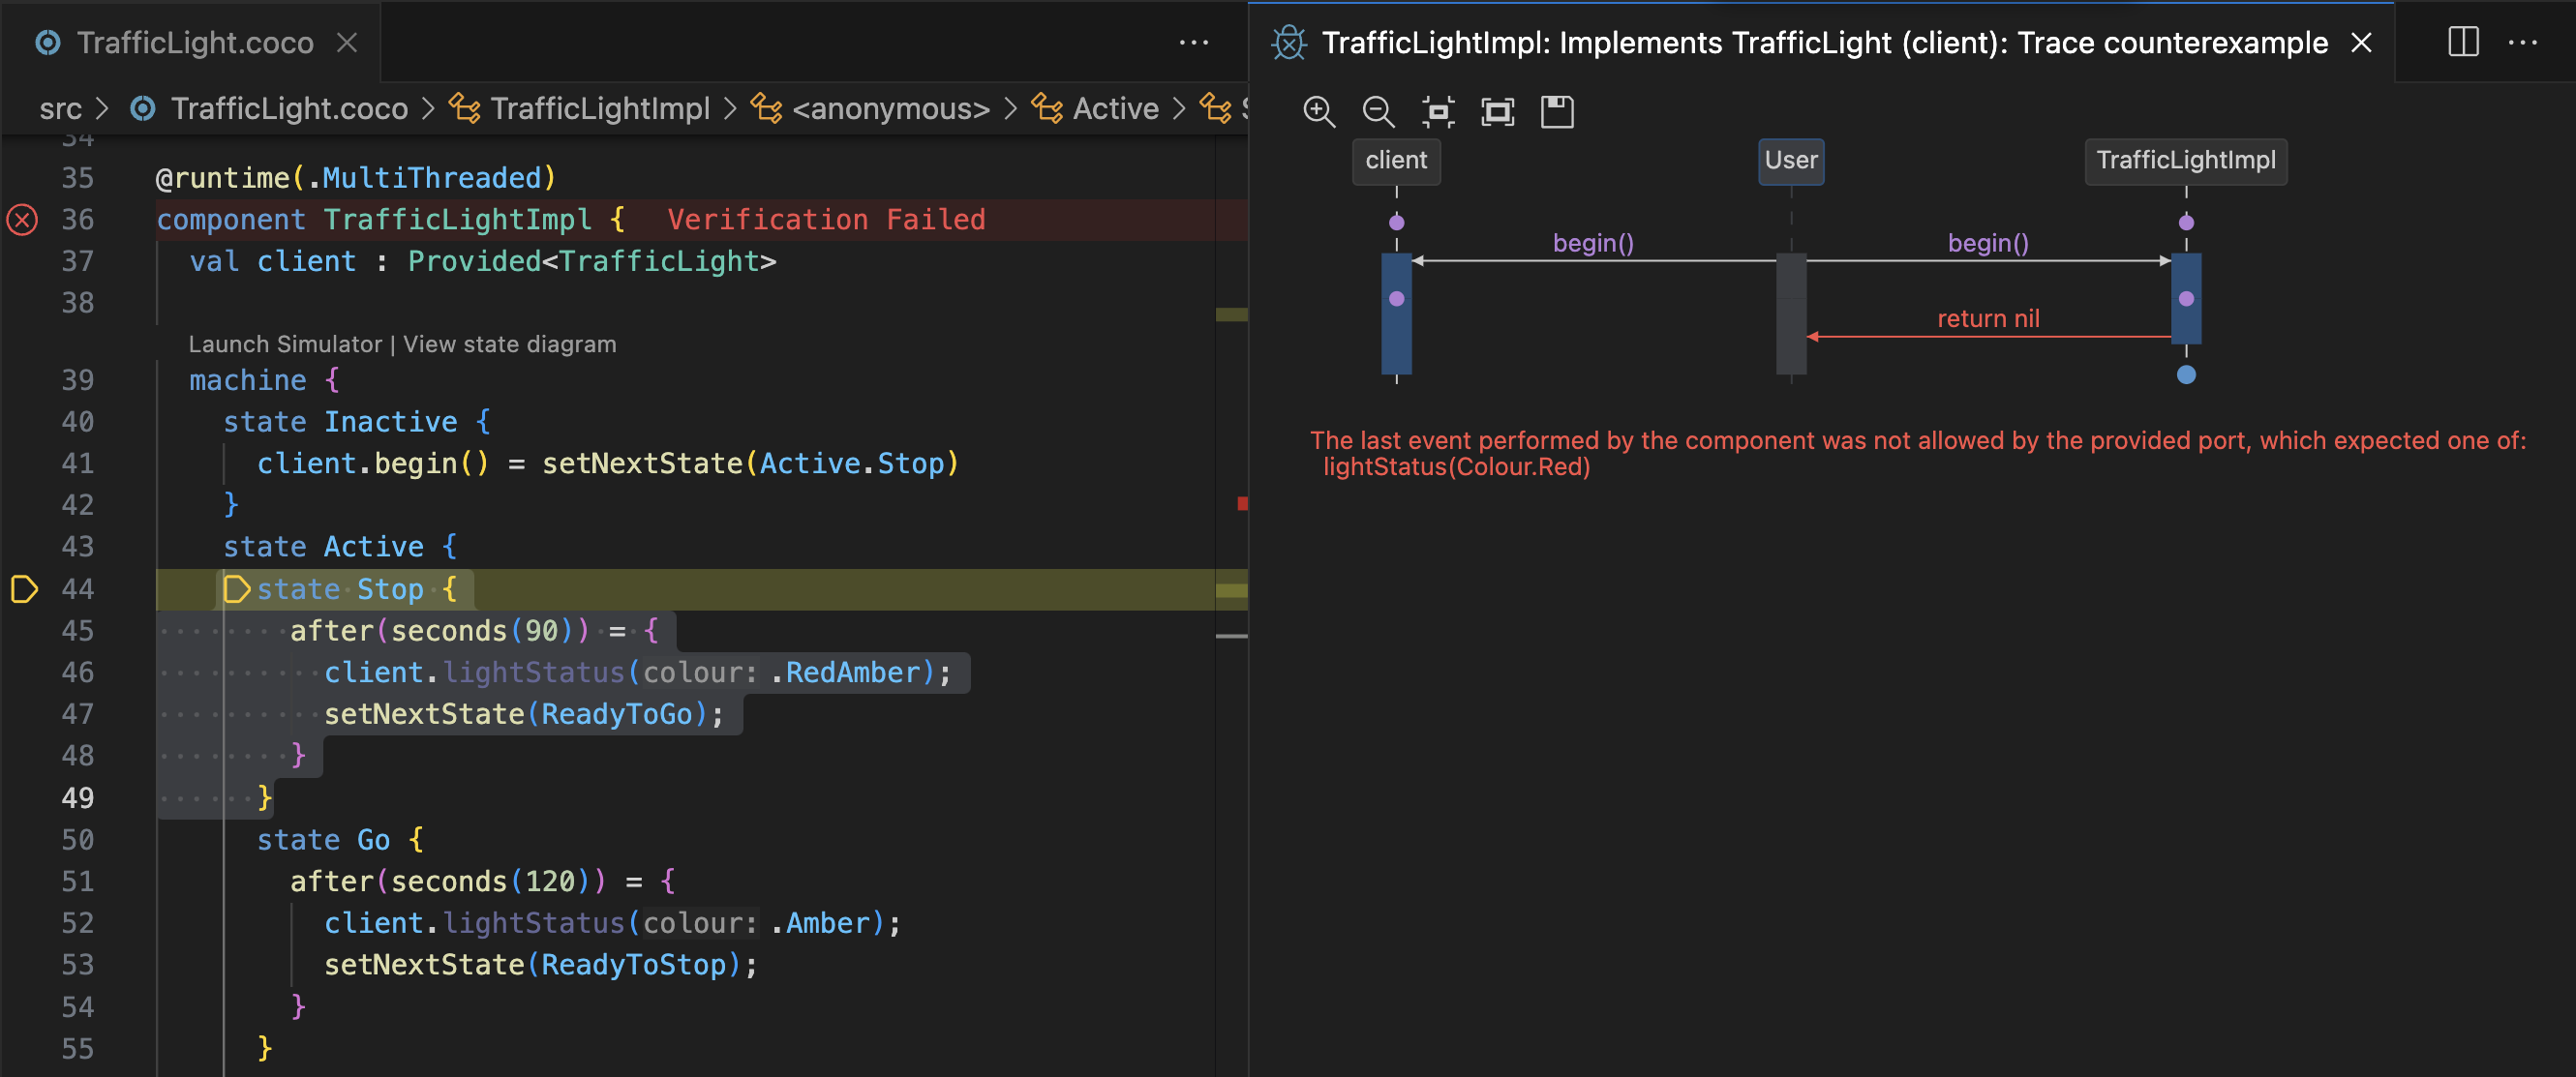
As illustrated above, the counterexample consists of a graphical sequence diagram, describing (one of) the shortest
sequences of interactions the component could perform that led to it violating its provided port specification.
For this type of counterexample, there are three swimlanes in the sequence diagram: one for the component
(TrafficLight), one for the component’s provided port (client), and one labelled User, which represents an external
entity invoking all possible calls allowed by the provided port. If the component correctly implements its provided port,
then it must perform all events that its provided port specifies it must, and it must not be able to perform any events
that are not permitted by its provided port. You can find a more detailed description of this property (and all other
properties verified) in the Coco Language Reference.
In our example, we can see when the begin() function is called on the component, it immediately returns. This is not
allowed by its provided port, which specifies that when begin() is called, the component must send the signal
lightStatus(Colour.Red) and then return.
Popili’s debugger provides additional information in VS Code’s Run and Debug view () to help users understand the errors found by the verification. You can find further details about these features, and how you can use them effectively to debug your software, in Coco Tooling - VS Code.
To correct the error found in our example, go to the component’s state InActive and replace the event transition
for begin() with the following:
client.begin() = {
  client.lightStatus(.Red);
  setNextState(Active.Stop);
}
If you save your changes, and rerun the verification, then all the assertions should now pass.
Generating Code
Now that your Coco package passes verification, you can automatically generate the code in your chosen target language by either clicking on in the Assertions view menu, or selecting one of Popili’s code generation options using the Command Palette:

The code will be generated in the subfolder called generated within your package. If this folder does not already exist, then it will be automatically generated.